Crawl Space Vapor Barrier: Complete 2026 Installation Guide
How to install a crawl space vapor barrier correctly: mil thickness, code requirements, step-by-step installation, and the products that pass inspection.
A crawl space vapor barrier stops ground water vapor from entering your crawl space, prevents mold and wood rot, lowers humidity throughout your home, and helps your HVAC run less. Done right, one install lasts the life of the house.
This covers what mil thickness to choose, what the code actually requires, the exact installation steps, and which product specs matter.
What Is a Crawl Space Vapor Barrier?
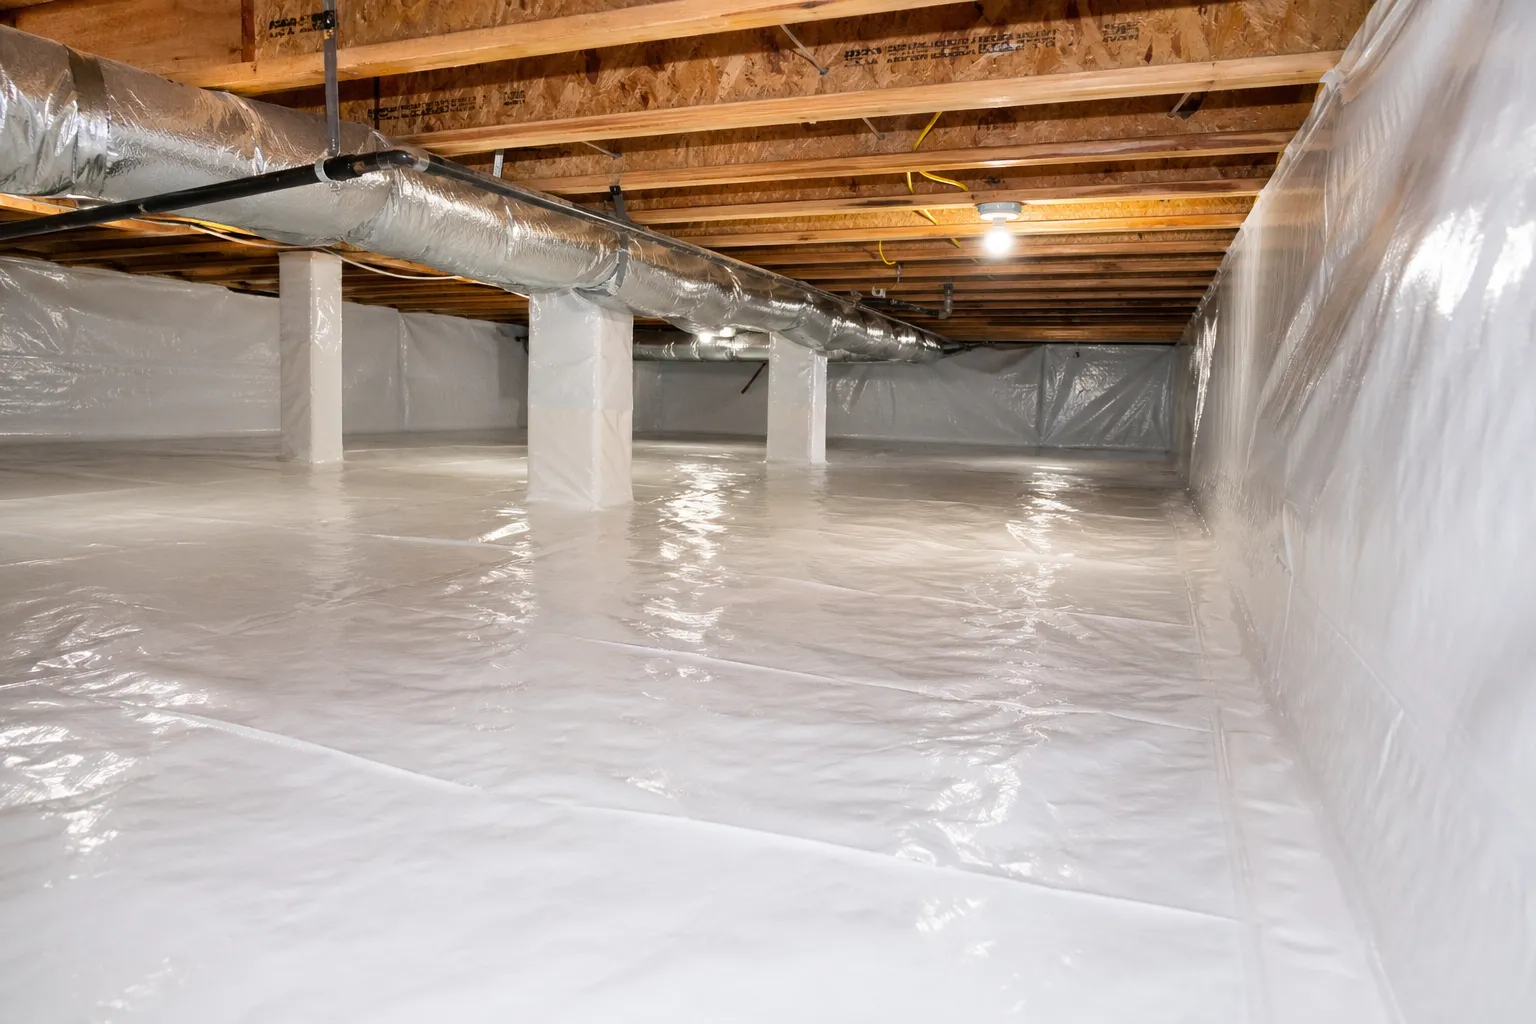
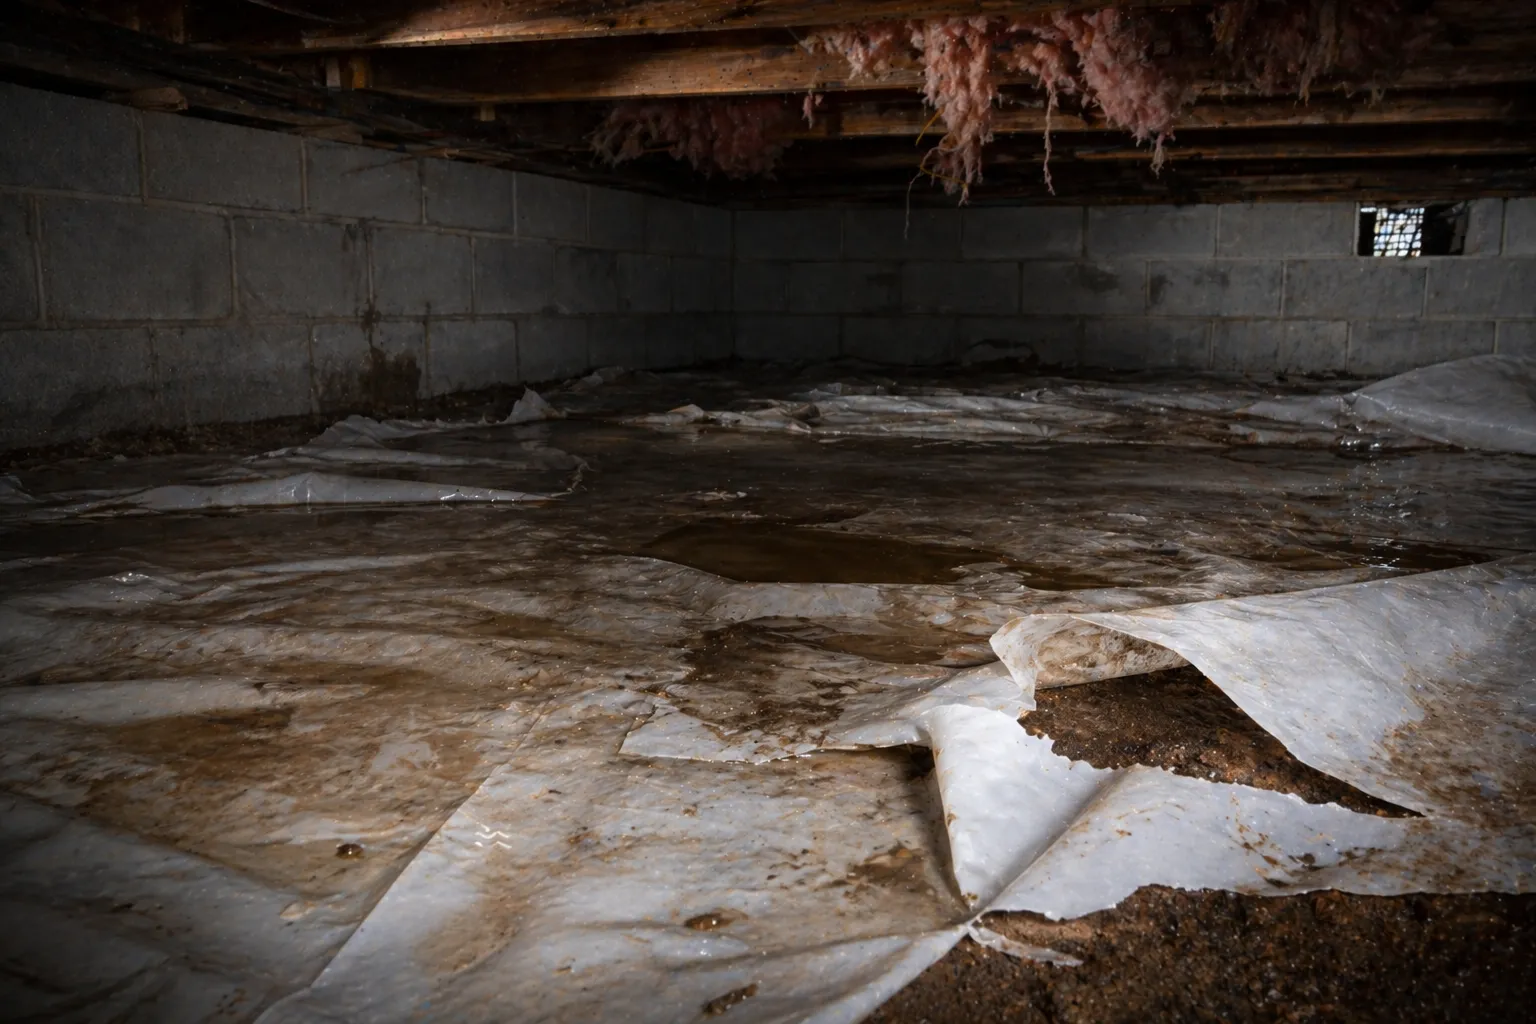
A crawl space vapor barrier is a heavy-duty plastic sheet (usually polyethylene or reinforced HDPE) installed across the floor and up the foundation walls of your crawl space. Its job is to block water vapor that constantly rises out of bare soil, vapor that would otherwise condense on cold framing, joists, ductwork, and insulation.
The hidden water problem
Without a vapor barrier, a typical 1,500 sq ft crawl space can release 10–15 gallons of water per day into the air below your home. That moisture has to go somewhere. It usually goes into your insulation, framing, and living space.
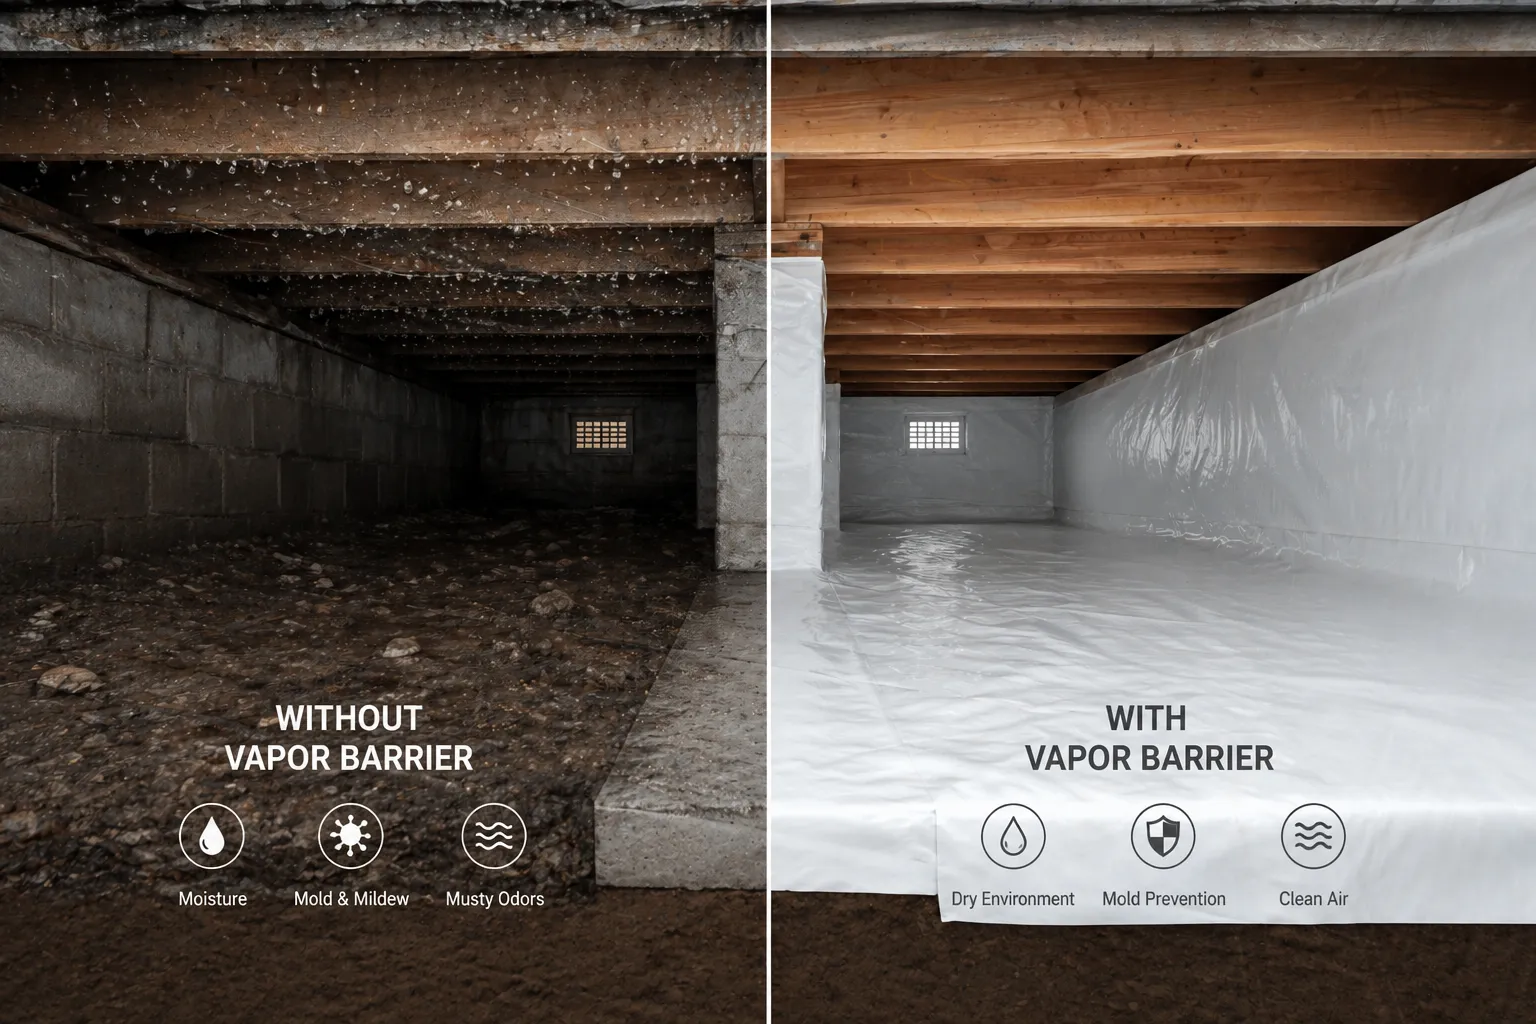
Install it correctly and it fixes all of this:
Stops mold & mildew
Cuts off the moisture supply that mold needs to colonize framing and insulation.
Prevents wood rot
Joists, sill plates, and subfloor stay dry. Structural lifespan extends by decades.
Lowers indoor humidity
Up to 60% of home humidity can come from the crawl space. Sealing it dries the whole house.
Eliminates musty odors
Air rises from the crawl space into living spaces. Clean crawl space, clean indoor air.
Reduces radon & soil gas
Class 1 barriers also block radon and other naturally occurring soil gases.
Deters pests
Termites, rodents, and roaches need moisture. A dry crawl space is a hostile habitat.

Vapor Barrier vs Vapor Retarder vs Encapsulation
These terms get used interchangeably, but they aren’t the same thing.
| Term | What It Does | Permeance |
|---|---|---|
| Vapor Barrier (Class 1) | Blocks nearly all water vapor | ≤ 0.1 perms |
| Vapor Retarder (Class 2) | Slows vapor transmission | 0.1–1.0 perms |
| Vapor Retarder (Class 3) | Minimal vapor restriction | 1.0–10 perms |
| Full Encapsulation | Vapor barrier + sealed vents + dehumidifier | Class 1 required |
For crawl spaces, you almost always want a Class 1 product.
For crawl spaces, you almost always want a Class 1 vapor barrier. Anything less and you’ll still get moisture problems over time. Building codes in most states now require a Class 1 product when finishing or sealing a crawl space.
What Mil Thickness Do You Need?
Mil is the thickness of the plastic: 1 mil = 1/1000 of an inch. Thicker is more puncture-resistant and lasts longer, but it costs more.
| Mil | Best For | Lifespan | Foot Traffic |
|---|---|---|---|
| 6 mil | Bare-minimum code, no traffic | 5–10 years | None |
| 10 mil | Most residential crawl spaces | 15–20 years | Light |
| 12 mil | Standard for full encapsulation | 20+ years | Moderate |
| 14–16 mil | Contractors entering regularly | 25+ years | Heavy |
| 20 mil | Commercial / maximum protection | 30+ years | Heavy |
Recommended: 10–12 mil reinforced for most homes.
Our recommendation
For a finished, encapsulated crawl space you’ll inspect once or twice a year, 10–12 mil reinforced vapor barrier is the sweet spot. It will outlast the home and resist tears from rocks, debris, and tools. If your crawl space has a sump pump or is used for storage, step up to 14–16 mil.
Code Requirements (2026 IRC)
The 2021/2024 International Residential Code (adopted by most U.S. jurisdictions in 2025–2026) requires the following for crawl spaces:
IRC R408.1: Class 1 vapor retarder
A vapor retarder rated ≤ 0.1 perms must cover all exposed earth in the crawl space.
6-inch seam overlap minimum
All seams must overlap at least 6 inches and be sealed with vapor-barrier tape.
Sealed wall terminations
Edges must run at least 6 inches up the foundation wall and be sealed in place.
ASTM E1745 compliance
Plastic vapor retarders for under-slab and encapsulation work must meet ASTM E1745.
Look for products that explicitly meet ASTM E1745 Class A, B, or C. Class A is the most durable and recommended for under-slab applications. Class B is standard for crawl spaces.
Step-by-Step Installation Guide
Tools and Materials You’ll Need
- Reinforced vapor barrier (10 mil minimum, sized for ~10–15% overage)
- Vapor barrier seam tape (butyl-based, not regular duct tape)
- Mechanical fasteners or termination strips for wall attachment
- Utility knife, tape measure, headlamp
- Knee pads, gloves, dust mask
- Optional: trowel and sealant for foundation cracks
- 1
Prep the crawl space
Remove all debris, fallen insulation, and wood scraps. Sharp objects will puncture the barrier. Clear everything down to bare soil.
Do not install over standing water. Fix the drainage problem first (regrade exterior, install a sump pump, extend downspouts). Inspect for active termites or pests and treat them before sealing.
- 2
Repair foundation cracks
Patch visible cracks in foundation walls with hydraulic cement or polyurethane sealant. The vapor barrier seals the soil, but you also want to stop bulk water entry through walls.
- 3
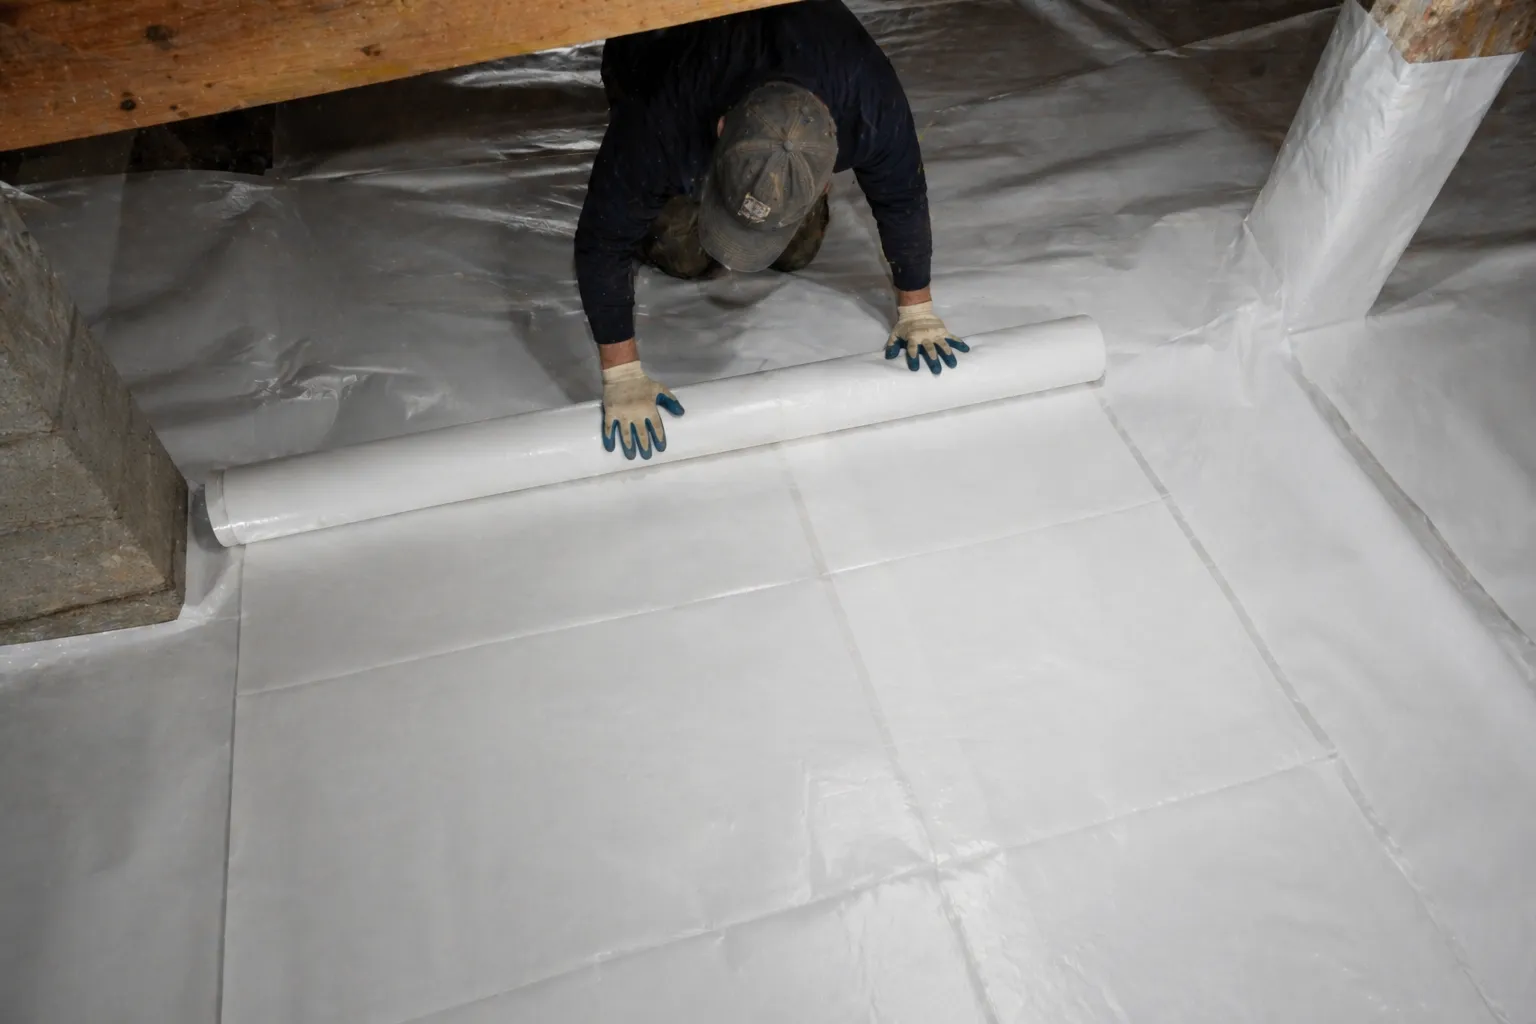
Lay the vapor barrier
Roll the barrier across the soil floor, covering every square inch. Cut around piers, posts, and obstructions, leaving a small gap to seal later.
Overlap all seams by at least 12 inches. Code requires 6, but 12 gives you a margin for movement and ensures full coverage.
- 4
Seal the seams
Run vapor barrier tape down the center of every seam. Use a butyl-based seam tape rated for below-grade use. Household duct tape and packing tape will fail within months.
Press firmly with a clean roller or your hand for full adhesion. Wipe plastic clean before taping if dusty.
- 5
Attach to foundation walls
Run the barrier up the foundation walls at least 6 inches (12 inches preferred for full encapsulation). Attach using one of these methods:
- Mechanical termination strip (most professional, longest lasting)
- Concrete anchors with washers every 24 inches
- Heavy-duty butyl mastic and tape (shorter-term installs)
Seal the top edge with vapor barrier tape or polyurethane sealant.
- 6
Seal around penetrations
Cut neat openings around piers, posts, plumbing, and ductwork. Seal each penetration with vapor barrier tape, butyl mastic, or specialized boot collars.
This is where most DIY installs fail. Gaps around piers let moisture pour in and undermine the entire system. Take your time here.
- 7
Verify the install
Check every seam and edge. The barrier should look like one continuous, sealed sheet covering the floor and turning up the walls. No exposed soil anywhere.
DIY vs Professional Cost
Materials only. 1,500 sq ft crawl space, 1–2 days work.
Vapor barrier only, 1 day. Includes labor, materials, cleanup.
Barrier + sealed vents + dehumidifier. 2–3 days professional install.
For most homeowners with a typical crawl space, this is a DIY job. It’s dirty work, not technical. Hire a pro when:
- Crawl space is under 24 inches tall (extremely tight)
- You want full encapsulation (sealed vents + dehumidifier)
- The crawl space has active water issues
- Local code requires a permit and inspection
Recommended Product: VaporMax Class 1 Vapor Barrier
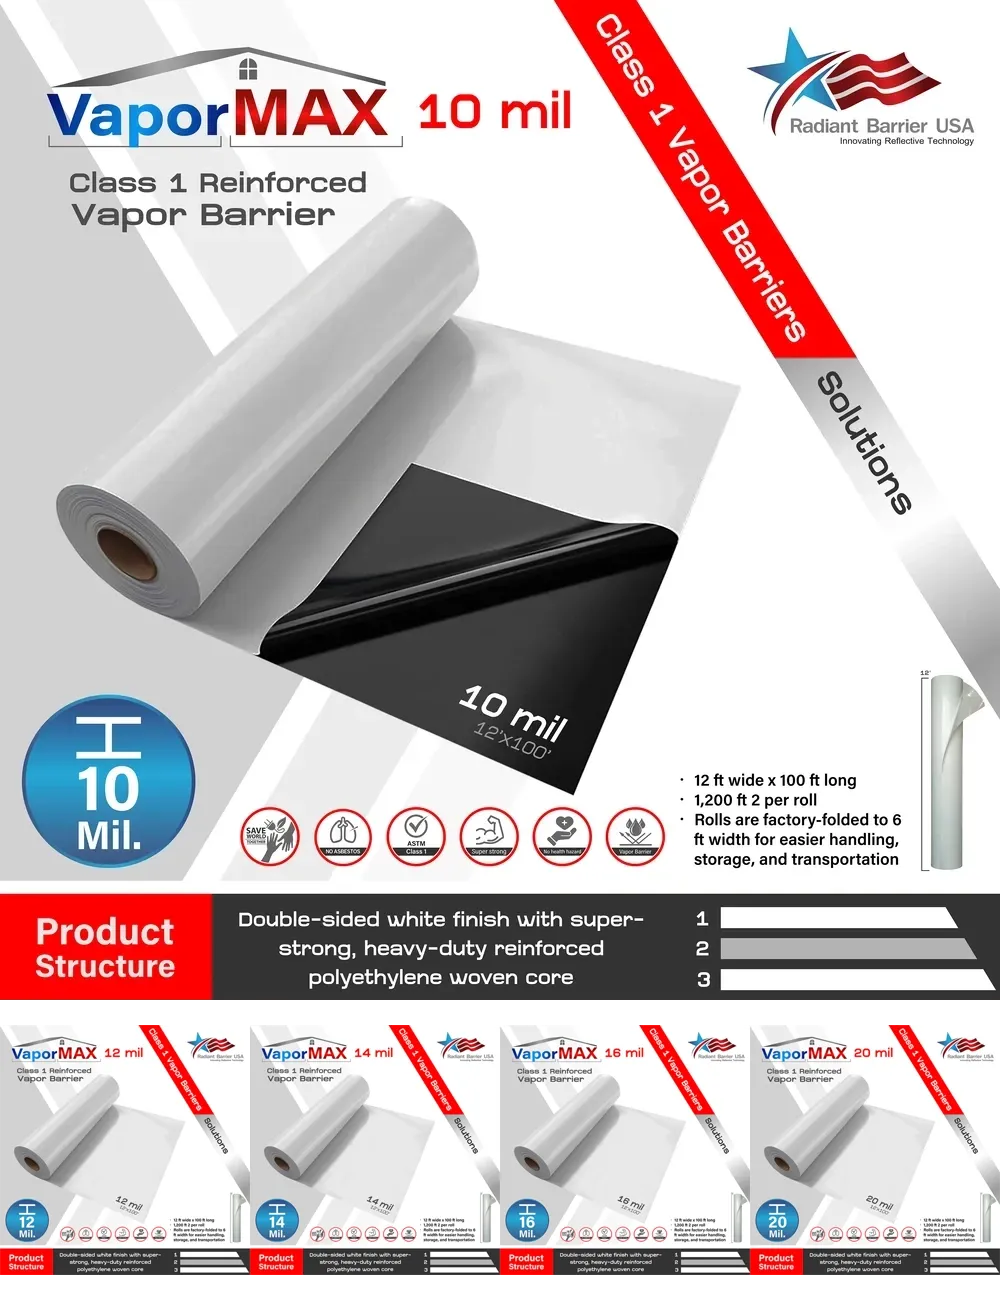
VaporMax Class 1 Vapor Barrier
A Class 1 reinforced HDPE geomembrane that meets ASTM E1745 standards. Designed for crawl spaces and under-slab applications where moisture protection has to last decades.
- Class 1 rated: less than 0.1 perms (lowest moisture transmission available)
- Reinforced HDPE construction resists punctures from rocks, fasteners, and foot traffic
- ASTM E1745 certified for crawl spaces and under-slab use
- 5 thickness options: 10, 12, 14, 16, and 20 mil
- Available in white-on-black and white-on-white finishes
- 1,200 sq ft rolls (12' × 100') plus 300 sq ft liner rolls (3' × 100')
VaporMax At a Glance
| Property | Specification |
|---|---|
| Standard Roll Size | 12' × 100' (1,200 sq ft) |
| Thickness Options | 10, 12, 14, 16, 20 mil |
| Roll Weight | 48.5–96 lbs |
| ASTM E1745 Class 1 | ✓ Pass |
| Resistance to Fungi (ASTM C1338-08) | ✓ Pass: No Growth |
| Fire Rating | Class 1 |
| Available Finishes | White-on-black, White-on-white |
Common Mistakes to Avoid
Five mistakes that void your install
1. Using 6 mil plastic from the home center. Not reinforced, tears easily, and has higher permeance than a true Class 1 barrier. Will fail inspection in most jurisdictions.
2. Skipping the seam tape. Loose overlaps let vapor through. Use butyl-based vapor barrier tape on every seam.
3. Not sealing wall terminations. A barrier on the floor only is doing half the job. Vapor still enters through the foundation wall and soil interface.
4. Installing over wet soil. Trapping water under the barrier creates a worse mold problem. Dry the area or fix the drainage first.
5. Using regular duct tape or Tyvek tape. Neither is designed for permanent below-grade contact. Use butyl-based vapor barrier tape only.
Frequently Asked Questions
Do I need a vapor barrier if my crawl space already has insulation?
Yes. Insulation doesn't block water vapor, it only slows heat transfer. Insulation in a crawl space without a vapor barrier often becomes wet, compresses, and grows mold. Always install the vapor barrier first.
Can I install a vapor barrier myself?
Yes. For most crawl spaces under 1,500 sq ft and at least 24 inches tall, this is a doable DIY project for one or two weekends. The main difficulty is the cramped working conditions, not the technique.
How long does a crawl space vapor barrier last?
A 10-mil reinforced barrier lasts 15–20 years. A 12-mil or thicker product lasts 25+ years and typically outlasts the home. Cheap 6-mil construction plastic only lasts 5–10 years.
Should I seal my crawl space vents?
If you're doing full encapsulation, yes. Sealed vents combined with a dehumidifier maintain steady humidity. If you're only installing a vapor barrier, leave vents open per local code.
Will a vapor barrier reduce my energy bills?
Indirectly, yes. By lowering crawl space humidity, your AC removes less moisture from indoor air and runs less. Most homeowners see a 10–20% reduction in summer cooling costs after installing a quality vapor barrier and sealing air leaks.
What's the difference between VaporMax and a 6-mil polyethylene sheet?
VaporMax is a reinforced HDPE geomembrane: the plastic is woven and laminated for tear and puncture resistance, and it meets ASTM E1745 Class 1 standards. Standard 6-mil polyethylene is a single-layer film that tears easily and doesn't meet code in most jurisdictions for crawl space encapsulation.
Product and Quantity
A cheap 6-mil sheet saves a few hundred dollars today and costs tens of thousands in mold remediation later. Get the right thickness and a product that passes ASTM E1745.
VaporMax Class 1 Vapor Barrier (10 mil to 20 mil)
ASTM E1745 certified reinforced HDPE. The contractor-grade vapor barrier that lasts as long as your home.
Need help choosing the right thickness or quantity? Contact our team and we’ll spec it out.